Drawing with Core Graphics using Swift

This technique illustrates a mid-level technique: implementing custom Core Graphics drawing in a UIView. Often a custom effect in a View can be implemented by adding subviews and positioning them with constraints. But other times, you just need to take over and draw what you need. In those cases--CoreGraphics to the rescue.
In this post we'll implement the view shown below in the video demo. This view allows a user create a design made of concentric ellipses rotated around a center point.
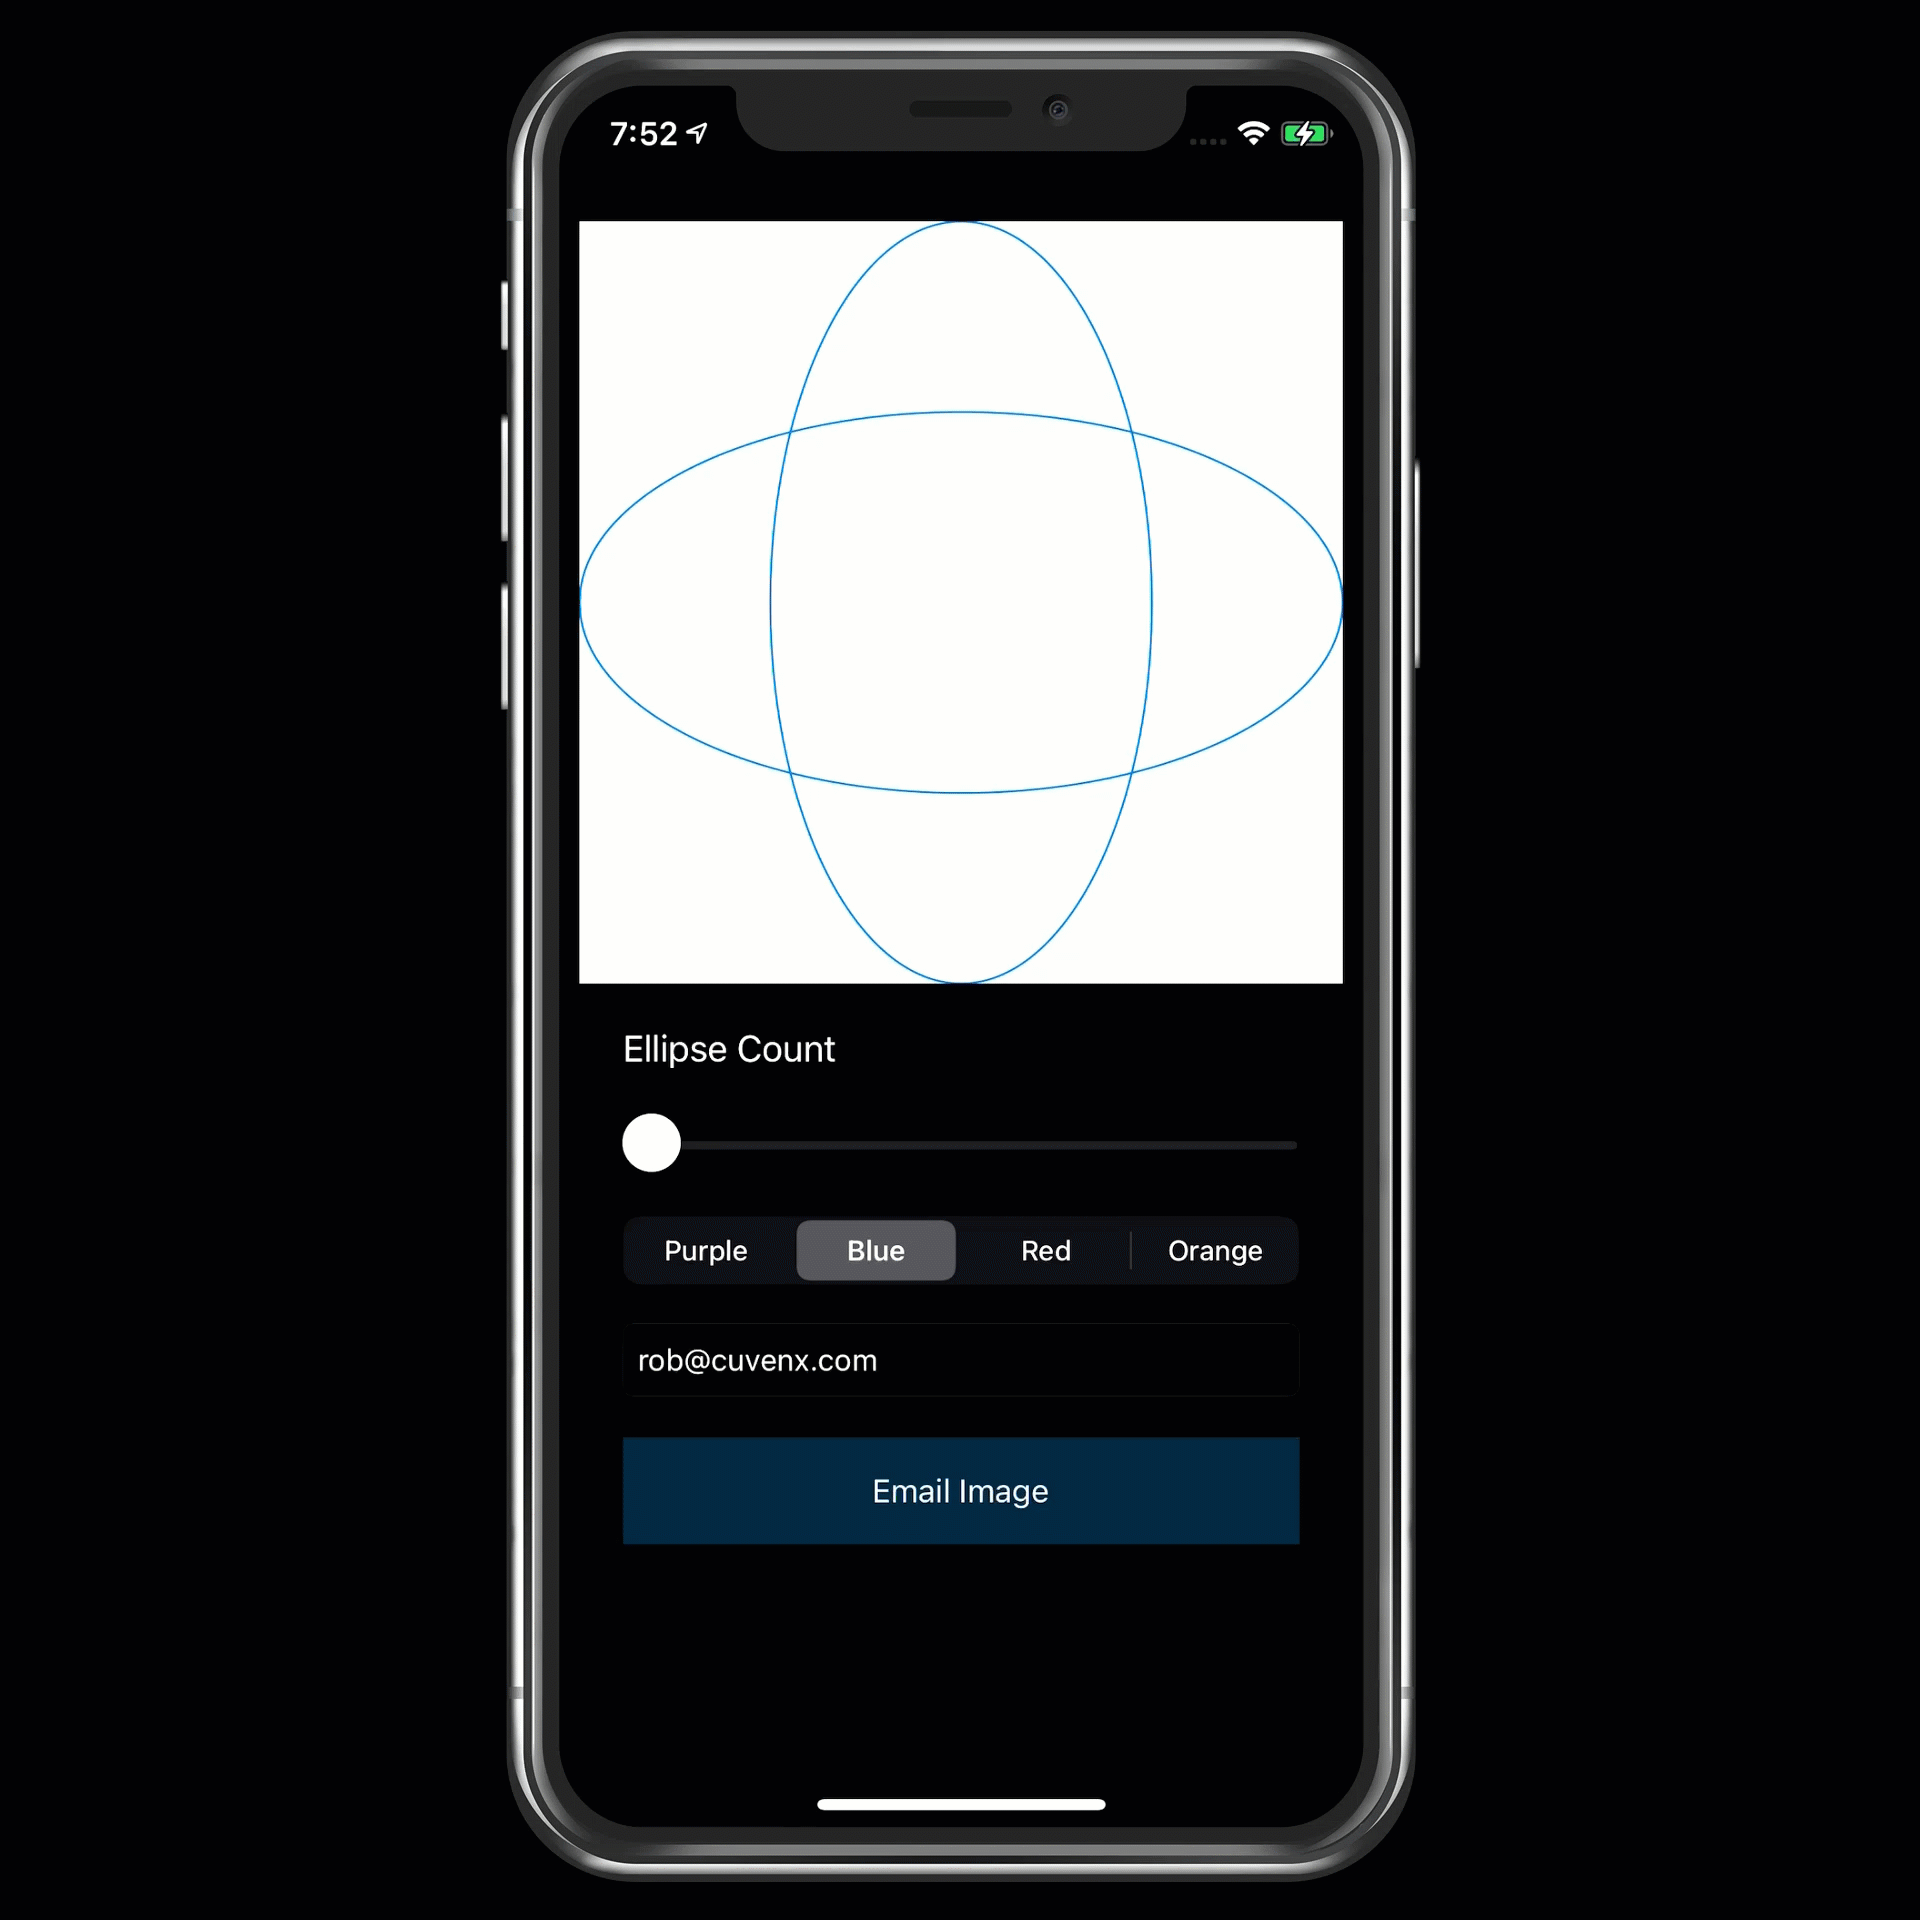
Demonstration of a Custom Drawn UIView
What makes this solution particularly well-suited for a custom drawn UIView is the flexibility:
- The user can choose how many ellipses to include in the design
- The color is selectable (by segment control, but could be improved to select any color from a color picker).
Implementing the custom drawn UIView is an efficient design, requiring only about 10 lines of code!
Custom Drawn UIView Code
The meat of the custom UIView code is as follows.
class DesignView: UIView {

    var numberOfEllipses = 2 {
        didSet {
            setNeedsDisplay()
        }
    }

    var color = UIColor.systemPurple {
        didSet {
            setNeedsDisplay()
        }
    }

    override func draw(_ rect: CGRect) {
        if let context = UIGraphicsGetCurrentContext() {
            context.setLineWidth(1.0)
            color.set()

            context.translateBy(x: frame.size.width / 2.0,
                                y: frame.size.height / 2.0)

            let amount = Double.pi * 2 / Double(numberOfEllipses)

            for _ in 1...numberOfEllipses {
                context.rotate(by: CGFloat(amount))

                let rect = CGRect(x: -(frame.size.width * 0.25),
                                  y: -(frame.size.height / 2.0),
                                  width: frame.size.width * 0.5,
                                  height: frame.size.height)

                context.addEllipse(in: rect)
            }
            context.strokePath()
        }
    }
}
Code snippet to custom draw ellipses in a UIView Draw method
At the the top of the custom UIView class, two properties control the appearance of the final design:
- numberOfEllipses sets how many ellipse objects are rotated around the center point. This is settable from the containing UIViewController using a UISlider. Whenever the value changes, the view is redrawn by calling *setNeedsDisplay() *on the view object.
- color sets the color of each ellipse. In the demo, the user chooses the color by selecting a segment in the UISegmentControl. Again, when a new color is selected, the view is redrawn by calling *setNeedsDisplay() *on the view object.
The drawing predictably happens in the UIView's draw(CGRect) function. To summarize:
- The first line of the routine obtains a drawing context. If one can be obtained, the style of the ellipses is set with *setLineWidth and color.set. *
- In the for loop at line 25, the number of ellipses wanted are drawn. In Core Graphics, we don't rotate the thing we want to draw--we rotate teh canvas on which we're drawing. It's a little indirect, but if you think about turning a piece of paper and then drawing an ellipse exactly the same way every time--that's pretty much what's happening here.
- By default, rotation will be around the origin of the View's canvas (top-left). Since we want to rotate around the center, we need to change the origin to the center via the context.translateBy() call at line 20.
- With the setup done, the loop runs through the number of iterations specified by the user, drawing the same ellipse at each incremental rotation.
- When all the ellipses are staged, the final strokePath() paints the preceding drawing commands into the canvas.
As can be seen in the demo video, the entire process happens very quickly as the user changes the input parameters for the custom design.
Related Posts
The demo video above actually illustrates two other techniques, covered in related posts:
Related Post: Capture a UIView as a JPEG image using Swift
Related Post: Sending Email with Image Attachments in Swift
Full Project Source Code
The source for this project is available in my GitHub repository: